Old lamp holders & Goodman handles.
They were good, but we are changing lamps so fast...
|
|
|
|
|
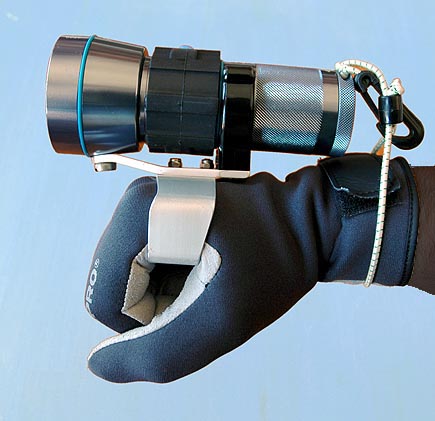
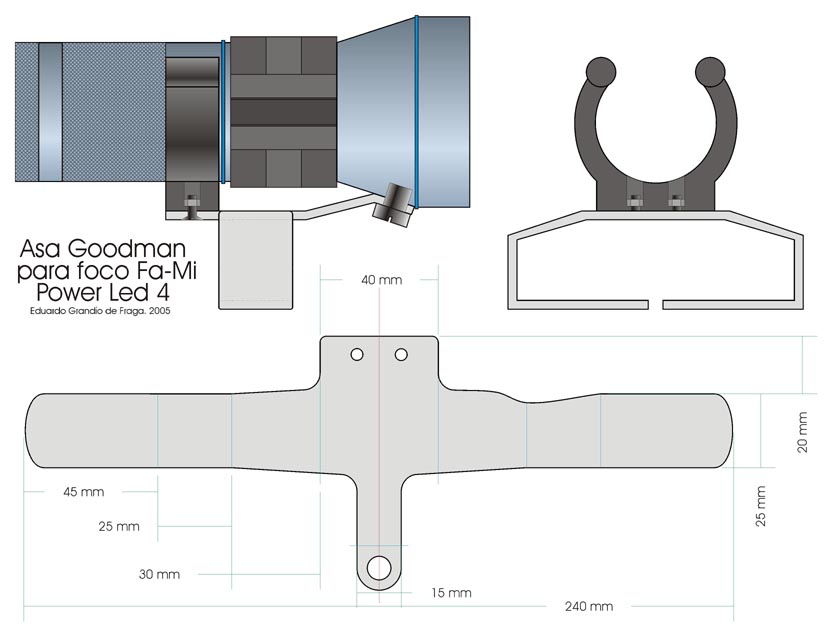
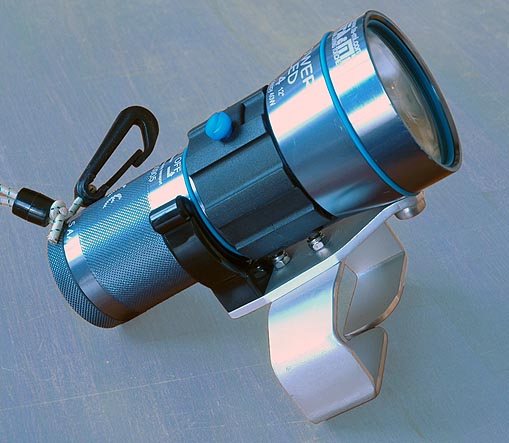
Goodman handle: First option is the classic Goodman design. Custom made handles do no need to be adjustable. Design is much more clean. Mine is mounted with two screwed parts, the lamp holder and the handle itself. The design proposed in the draw bellow, shows a better solution, with a just one part design. |
|
 |
|
|
 |
||
|
|
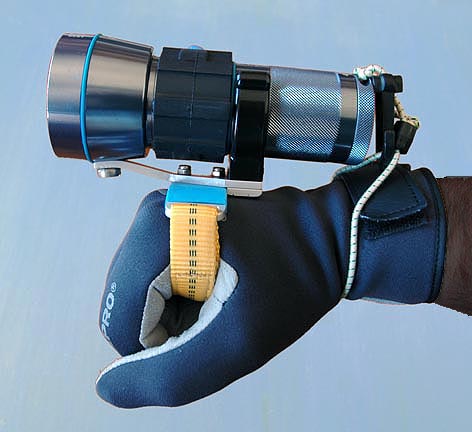
Semi soft Goodman handle: For night or wreck dives, when light is used almost full time, semi soft handles are very attractive, since are more comfortable than rigid handles, can be used more thigh to the hand in a way it is much more free to move. The support band is a 20mm. double face express mountain strap (it's like a splashed pipe) . This shape and the two Velcro straps stitched to it give enough thickness to the set to offer a good grip for the hand. |
|
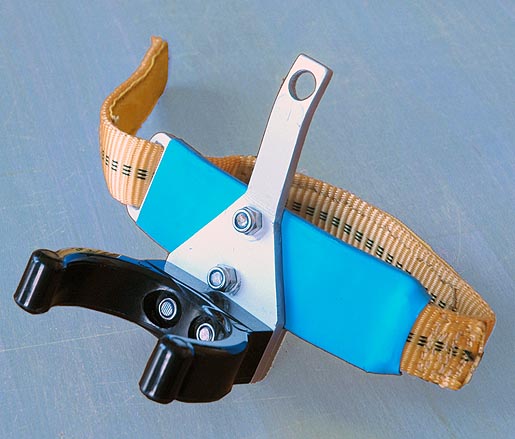 |
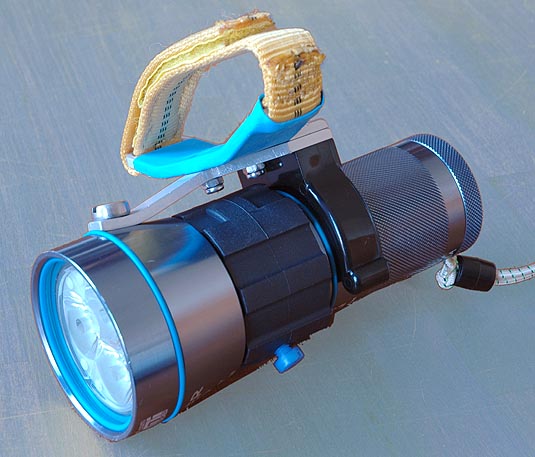
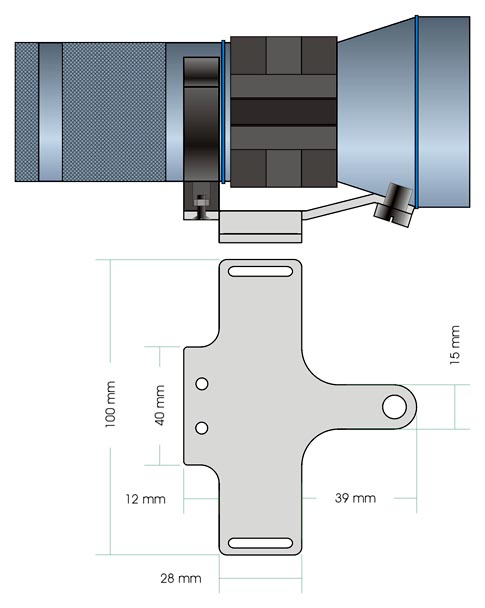
This handle is also mounted with two screwed parts, the lamp holder and the handle itself. The design proposed in the draw bellow, shows a better solution, with a just one part design. |
|
|
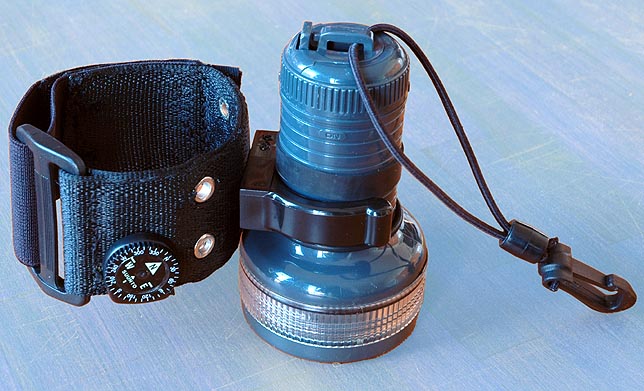
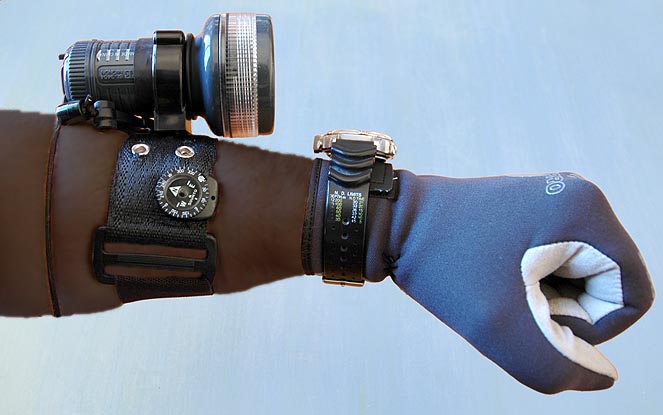
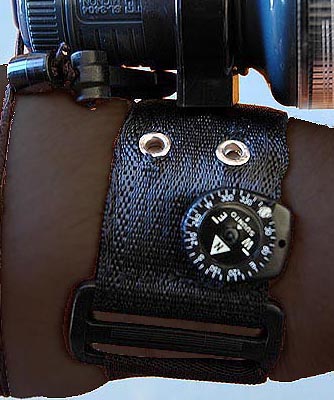
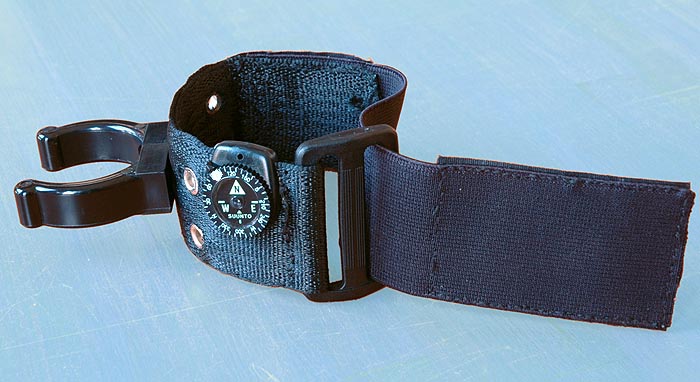
Soft forearm band: Soft forearm band is very convenient for day, cavern and no penetration wreck diving. It´s perfect too for a secondary lamp in night or penetration wreck dives. Usually the lamp stands in the forearm outer side, lighting in distance, but the set can be turned inwards, and, with the lamp in the inner side, it's easy to light the work that is being done within the hands, something than can be a real need and that is absolutely impossible with a Goodman handle. Trough restrictions, this system is marginally more entanglement prone than a standard Goodman handle, but his freedom and versatility balance this hypothetical problem. Mine has a small Suunto Clipper compass that is enough for the navigation I do. I have painted a white spot over the North position on the rotary bezel for easy alignment in poor light conditions. |
||
 |
||
  |
||
 |
|
|
 |
||
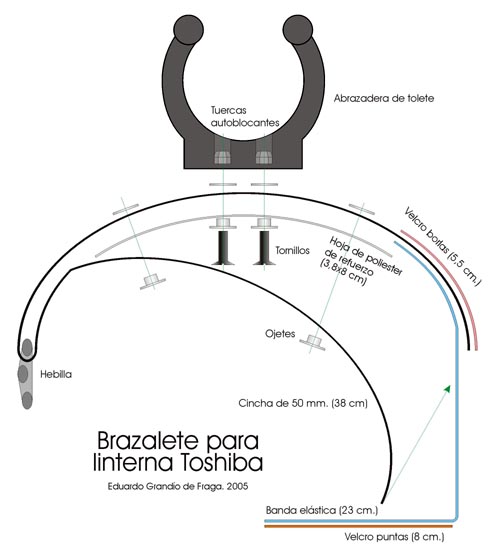 |
Parts List:
Tools: Scissors, screwdriver, pliers, grommet punch and attaching tool, a saw to cut the screws and a needle to stitch the whole. |
|
|
Procedures: 1.- En primer lugar, y una vez cortadas todas las piezas a sus longitudes exactas, procederemos a montar el refuerzo de poliester, para ello, con el sacabocados realizaremos dos agujeros centrados en la placa ( a la distancia de los de la abrazadera, en mi caso 15 mm.) y otros dos a 10 y 11,5 cm del extremo de la cincha. Después colocaremos el poliester en su lugar y remacharemos los ojetes. 2.- A continuación plegaremos la cincha de forma que coincidan los extremos y procederemos a realizar los agujeros de los cuatro ojetes restantes. Atención: en el primer paso los ojetes sólo cogían una capa de cincha y el plástico, ahora se formará un sandwich cincha / poliester / cincha. Es importante que durante el marcado y la perforación con el sacabocados el conjunto esté arqueado en una posición similar a la de uso final, para que la posición natural del brazalete sea curvada y no plana. 3.- Antes de remachar los 4 ojetes laterales hemos de atornillar la abrazadera y deslizar la hebilla en su sitio, pues una vez remachado, es imposible colocar ninguna de las dos piezas. Si tenemos dificultades para realizar estas 3 operaciones, podremos recurrir a un taller de talabartería, tapicería o mercería, que puede hacérnoslas, sobre la marcha. 4.- Ahora ya sólo es necesario coserlo todo concienzudamente con un hilo resistente. Igual que para el remachado, durante el cosido se mantendrá el conjunto arqueado, para que la forma natural se mantenga curvada. Se coserá toda la longitud de los dos laterales y transversalmente en la hebilla y en los extremos de la plancha de poliester, de la banda elástica y de las piezas de velcro. Notar que en el extremo opuesto a la hebilla se forma un sandwich cincha / elástico /cincha / Velcro (borlas). 5.- Es importante señalar que la banda elástica se voltea al pasar por el interior de la hebilla, lo que debe tenerse en cuenta para no montar el Velcro (puntas) por la cara incorrecta del elástico. |
||
![]()